HL7 Programming using .NET and NHAPI - Sending HL7 Messages
Introduction
This is part of my HL7 article series. Before we get started on this tutorial, have a quick look at my earlier article titled “A Very Short Introduction to the HL7 2.x Standard”. One of my earlier tutorials in this series titled "HL7 Programming using .NET - A Short Tutorial" gave you a foundational understanding of HL7 2.x message transmission, reception and message acknowledgement. I then introduced you to a .NET library called "NHAPI" (a port of the original Java-based HAPI HL7 framework which I covered in my previous tutorials) and showed you an example of how a HL7 message can be easily created using the library in my tutorial titled "HL7 Programming using NHAPI and .NET - Creating HL7 Messages". In this tutorial, we will build on the previous tutorial and look at how we can transmit a HL7 message once we have assembled one to a remote system using the NHAPI in conjunction with another .NET library called "NHAPI Tools". Although we will build a .NET HL7 receiving system in a subsequent tutorial, we will require a testing tool for now to respond back to the messages we transmit for the purpose of this tutorial. You can use the HAPI Test Panel which requires a Java runtime or a Java SDK. Alternatively, you can also use the free HL7 message listener from SMARTHL7 Tools available here or any other HL7 testing tool you prefer. In this tutorial, I will cover the set up of the HAPI test panel quickly for the readers to follow along.
Tools and Resources Needed
- .NET Framework 4.5 or higher
- A .NET IDE or Editor such as Visual Studio IDE or Visual Studio Code (even a text editor should suffice)
- NHAPI GitHub page is located here
- Install NHAPI Nuget Package using NuGet Package Manager
- NHAPI Tools GitHub page is located here
- Install NHAPI Tools Nuget Package using NuGet Package Manager
- Download HAPI Test Panel from here
- JDK 1.4 SDK or higher (this may be required to run HAPI Test Panel)
- You can also find all the code demonstrated in this tutorial on GitHub here
“One of the first conditions of happiness is that the link between Man and Nature shall not be broken” ~ Leo Tolstoy
Feature Overview
Most HL7 systems communicate messages with one another using the Minimum Lower Layer Protocol (often shortened to “MLLP”). MLLP can be simply considered a wrapper protocol on top of the TCP/IP protocol since the communicating systems need to be able to recognize the start and the end of each message as TCP/IP data is simply a stream of continuous bytes. MLLP typically uses non-printable characters to serve as wrapping characters around the core HL7 message information exchanged between these systems. If one were programming a HL7 system from scratch, then you will need to be familiar with many aspects of network programming such as sockets to accomplish the task of coordinating the steps require to establish TCP/IP communications between the two systems involved. However, using an existing library or framework is a safer approach. Even though the NHAPI library contains many features to support HL7 message processing, it does not contain functionality to send or receive HL7 messages. To overcome this limitation, we will use another tool called "NHAPI Tools" to supply this functionality for us. It offers a simple MLLP C# client aptly called SimpleMLLPClient which should do the job for us (see my earlier tutorial "HL7 Programming using .NET - A Short Tutorial" if you want to understand what goes into MLLP clients and receivers). We will be using NHAPI Tools in conjunction with the main NHAPI library for many of the subsequent tutorials as well. NHAPI Tools provides many helpful classes to make the task of processing messages even easier when working with the NHAPI core library. The following are some of the features provided by the NHAPI Toolkit:
- Send HL7 messages using MLLP protocol
- Support for reading HL7 files
- Support for Custom Segments (also known as "Z-segments")
- Ability to Customize Message Validation Behaviour
Message Transmission - Overview and HAPI HL7 Test Panel Setup
In the previous tutorial, we saw the we could easily encode a HL7 message for serialization to print to the program console. The job of serialization was handled by a special class called Pipe Parser which is one of the many types of parser classes that NHAPI provides. This parser enables the use of pipe delimiter characters during the message encoding and decoding process. Another type of parser that is available in the library is the XML Parser which helps encode and decode the HL7 message in XML format. NHAPI provides many such useful classes to enable the programmer to handle the message processing in multiple ways. In this tutorial, we will construct a message and transmit the HL7 message to a HL7 listener running on our own machine. Rather than building something from scratch we will use an extremely helpful testing tool provided by the authors of the original HAPI Java framework which served as the inspiration for the NHAPI project. The HAPI Test Panel will help us test the message transmission functionality of our .NET client by receiving the message we send, and it will respond back with a HL7 acknowledgement message (called an "ACK" in HL7 vocabulary).
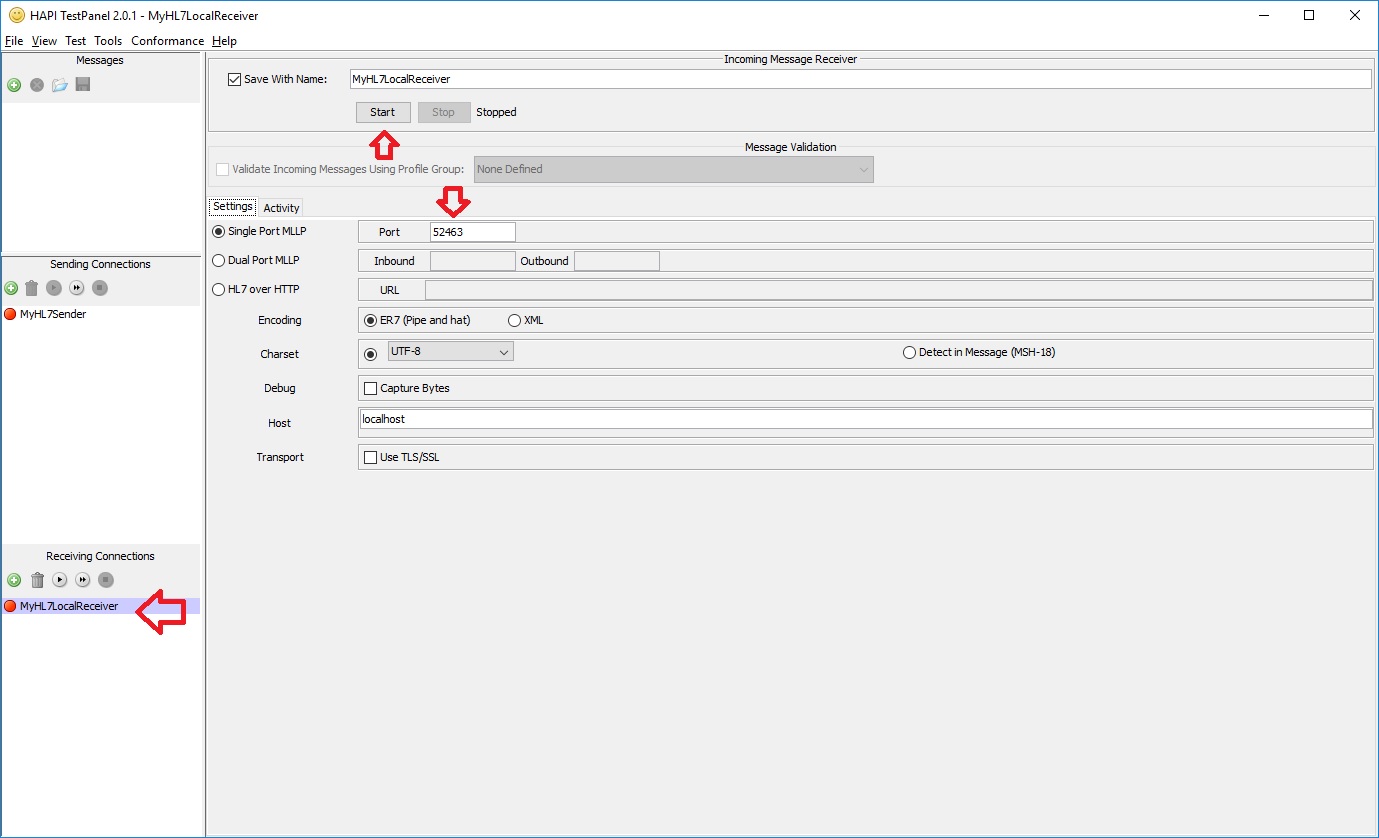
Setting up the HAPI Test Panel is very easy. Simply download the TestPanel compiled Jar file or the compilable source code. Please ensure that you have a suitable Java runtime installed on your machine (should be included in your JDK if you downloaded it previously). Then launch the test panel executable jar file. Since we are transmitting the HL7 message, we need to set up a listener. Create a new HL7 MLLP listener by adding a new one using the bottom left panel as shown in the screen capture below, choose the default port number the test panel suggest or enter a port number that does not conflict with any existing applications and hit the "Start" button. If the listener turns green in color, then you have successfully enabled a HL7 listener on your computer. See screen capture below that shows the HAPI Test Panel running on my computer.
    using System;
    using System.Diagnostics;
    using System.Text;
    using NHapi.Base.Parser;
    using NHapiTools.Base.Net;

    namespace HapiSendMessageSimpleExample
    {
        public class HapiSendMessageSimpleExample
        {
            private static int PORT_NUMBER = 52463;// change this to whatever your port number is

            public static void Main(String[] args)
            {
                try
                {
                    // create the HL7 message
                    // this AdtMessageFactory class is not from NHAPI but my own wrapper
                    // check my GitHub page or see my earlier article for reference
                    var adtMessage = AdtMessageFactory.CreateMessage("A01");

                    // create a new MLLP client over the specified port (note this class is from NHAPI Tools)
                    //Note that using higher level encodings such as UTF-16 is not recommended due to conflict with
                    //MLLP wrapping characters

                    var connection = new SimpleMLLPClient("localhost", PORT_NUMBER, Encoding.UTF8);

                    // send the previously created HL7 message over the connection established
                    var parser = new PipeParser();
                    LogToDebugConsole("Sending message:" + "\n" + parser.Encode(adtMessage));
                    var response = connection.SendHL7Message(adtMessage);

                    // display the message response received from the remote party
                    var responseString = parser.Encode(response);
                    LogToDebugConsole("Received response:\n" + responseString);

                }
                catch (Exception e)
                {
                    //in real-life, do something about this exception
                    LogToDebugConsole($"Error occured while creating HL7 message {e.Message}");
                }

            }

            private static void LogToDebugConsole(string informationToLog)
            {
                Debug.WriteLine(informationToLog);
            }

        }
    }
Sending message:
MSH|^~\&|Our System|Our Facility|Their Remote System|Their Remote Facility|20180919201233||ADT^A01|123420180919201233|P|2.3
EVN|A01|20180919201233
PID|378785433211||||Mouse^Mickey||||||123 Main Street^^Lake Buena Vista^FL^^USA
PV1||O|Some Point of Care^^^Some Treatment Facility|ALERT||||99999999^Smith^Jack^^^^^^^^^^456789||||||||||||||||||||||||||||||||||||20180919201233

Received response:
MSH|^~\&|Their Remote System|Their Remote Facility|Our System|Our Facility|20180919210709.36-0600||ACK^A01|3201|P|2.3
MSA|AA|123420180919210707
“To make democracy work, we must be a nation of participants, not simply observers. One who does not vote has no right to complain.” ~ Louis L’Amour
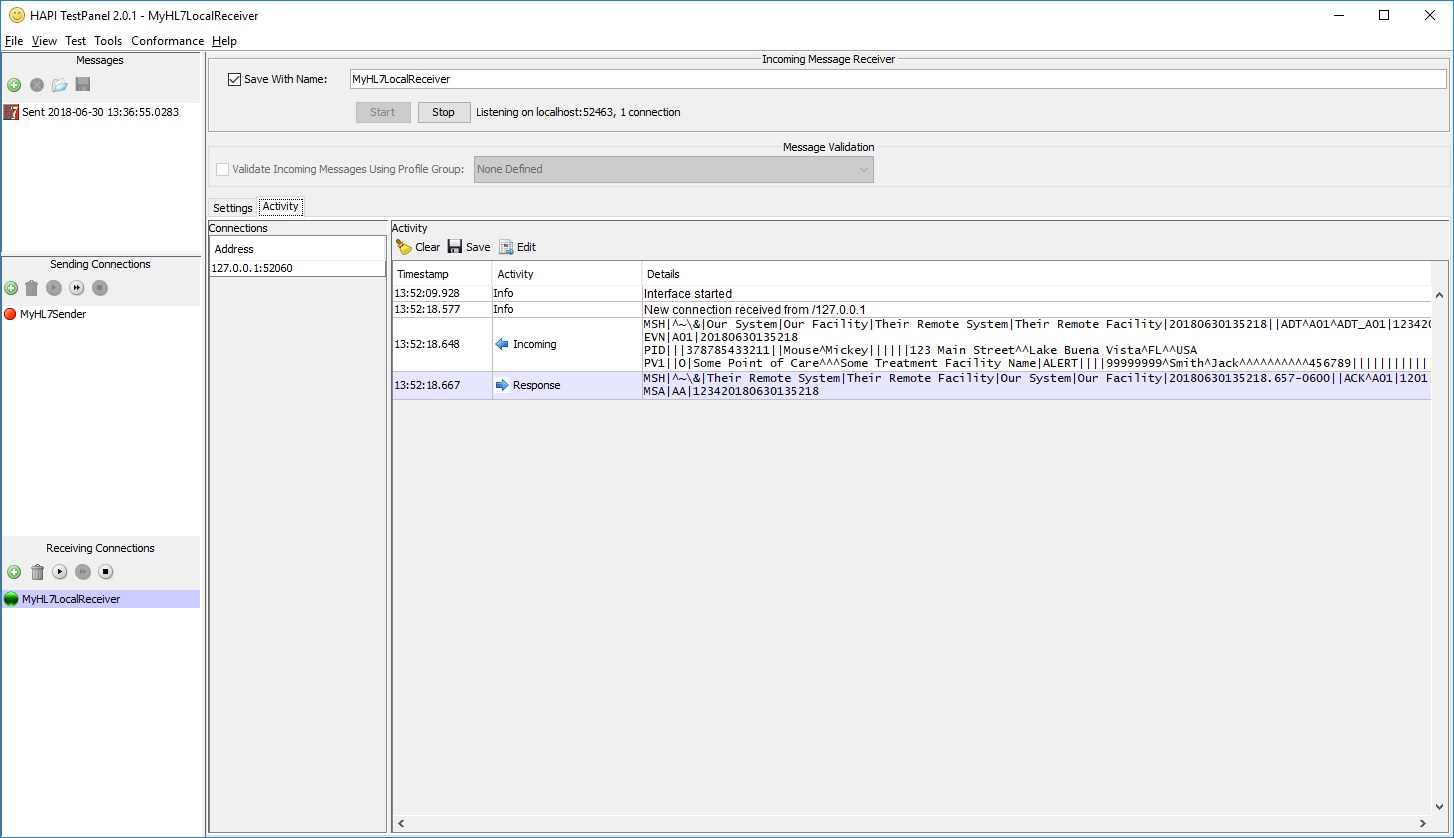
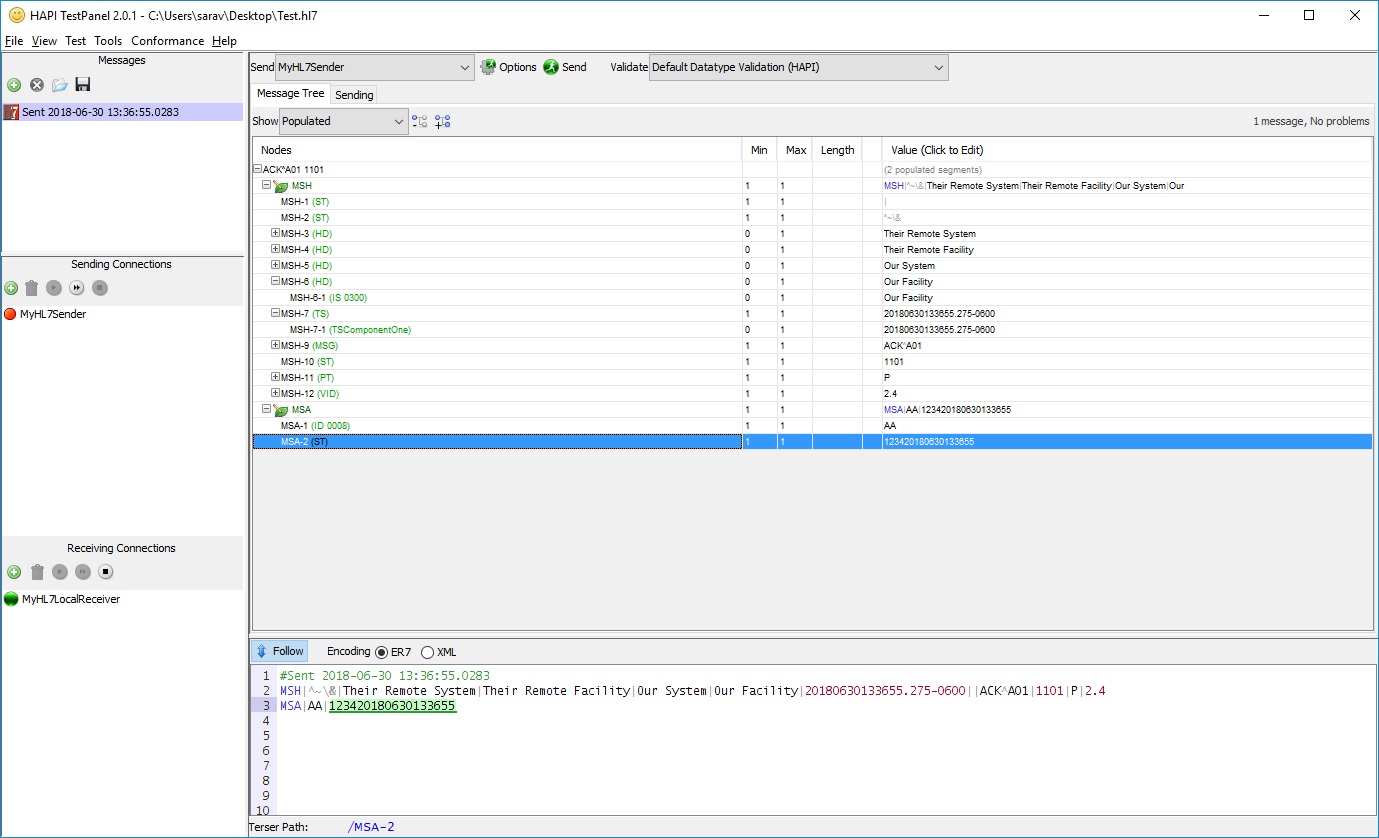
By running the code shown above, you should be able to send a HL7 ADT message to the listener and receive a message acknowledgement back. Message acknowledgement is a complex topic in itself and I will cover that in more detail in a separate tutorial on building HL7 listeners using the HAPI library. For now, just note that the HAPI Test Panel provides a nice breakdown of the message exchange activity showing the received message as well as the acknowledgment message that was transmitted back to our .NET client. You can select the received or sent message in the Test Panel and "Edit" it to see a nice tree structure breakdown of the various constituents of these messages if you wanted to verify whether the information was transmitted correctly. A screen capture of this functionality is shown below.
Conclusion
This concludes a quick overview and tutorial on using NHAPI HL7 library in conjunction with NHAPI Tools for message transmission using the MLLP over TCP/IP. Unlike the original HAPI Java toolkit, NHAPI does not have the same full feature set to support all our HL7 message processing needs, and additional tools such as "NHAPI Tools" are required. In the subsequent tutorials in my HL7 article series, I will be covering the use of a HL7 message hub called "HL7Fuse" for .NET built using NHAPI and NHAPI Tools that can help you build an extensible HL7 solution that has many powerful features including message routing. However, let us look at how to parse HL7 messages using the NHAPI framework in the next tutorial in this series. See you then!


